少し前から結構色々な、画像生成AIが話題になっている。
LINEでテキストメッセージを送ると画像を返してくれるような、簡単に使えるようなものを作ってくれる人もいて、早速フレンドになったはいいものの、すぐに制限に引っかかってしまい、面白くない。
というわけで、公開されている内容なので自前で用意してみようと考えた
Stable Diffusion
公開されている画像生成AIで、一番メジャーそうなのはこの「Stable Diffusion」のようなので、まずはそちらを使ってみることにした。
使うにはNVIDIAのボードを積んでいる必要があるようだ。ちなみに私のラップトップのスペックはこんな感じだ
CPU:AMD Ryzen 9 5900HS with Radeon Graphics 3.30 GHz
Memory:16G
GPU0:NVIDIA GeForce RTX 3050 Ti Laptop GPU
GPU1:AMD Radeon(TM) Graphics
前準備
Docker Desktopは入っているものとします。
また、NVIDIAのCUDA Toolkitを入れる必要があるそうです
https://developer.nvidia.com/cuda-downloads
Hugging Faceから学習済みモデルを取得
Hugging Faceという、学習済みのモデルやデータセットなどを公開してくれているサイトがあるので、そちらで公開されているStable Diffusion用のモデルを使用します
HuggingFace
https://huggingface.co/
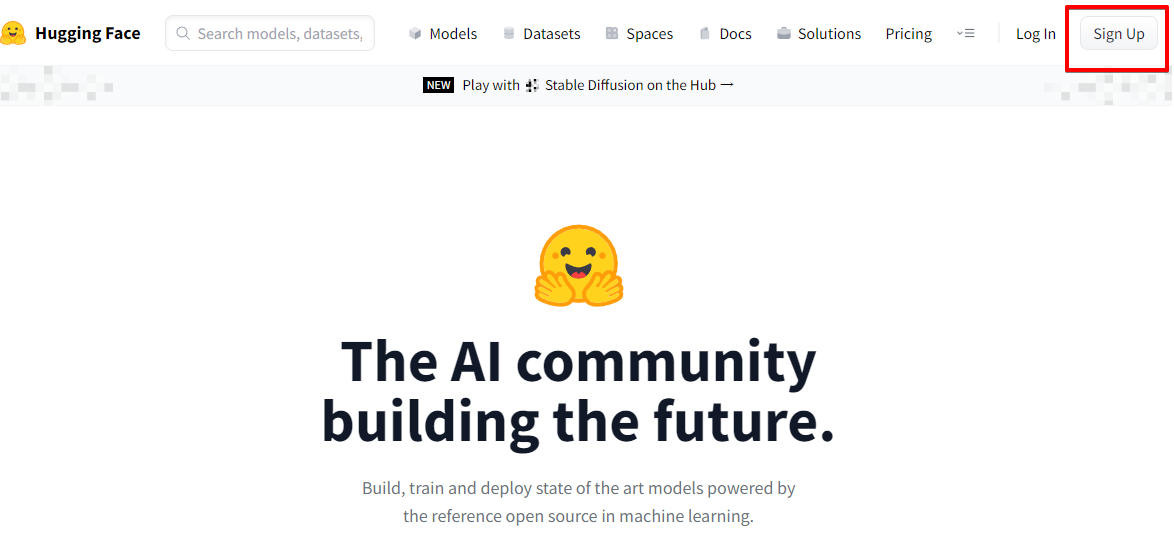
右上の「Sign Up」からアカウントを作成します。
必要事項を入力し、最終的にメールによるアクティベートを行った後に、モデルの利用申請を行います
公開されているモデルはいくつかありますが、今回は一番新しいv1-4を使いますので、こちらのページに行きます
CompVis/stable-diffusion-v1-4
https://huggingface.co/CompVis/stable-diffusion-v1-4
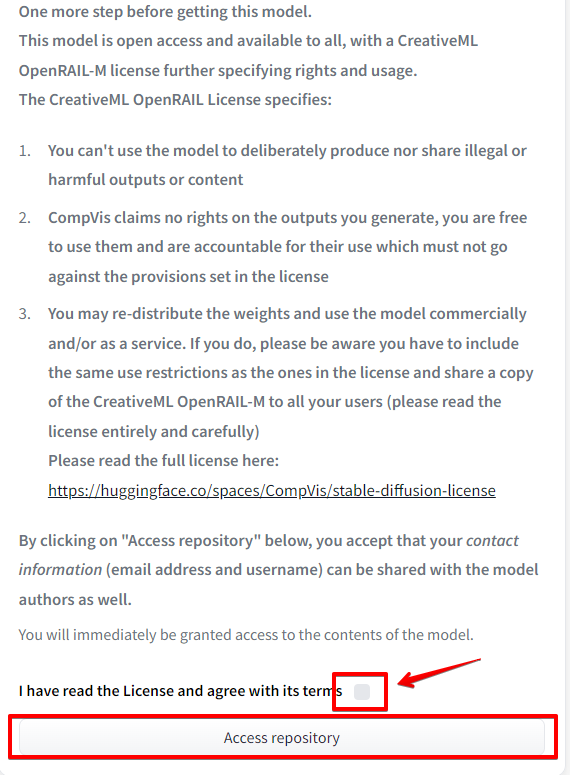
ライセンス条項を確認して、チェックを行い、リポジトリへのアクセス許可を得ます。
その後、ローカルにて下記コマンドでモデルをダウンロードします
>git clone https://huggingface.co/CompVis/stable-diffusion-v-1-4-original
Cloning into 'stable-diffusion-v-1-4-original'...
remote: Enumerating objects: 54, done.
remote: Counting objects: 100% (54/54), done.
remote: Compressing objects: 100% (53/53), done.
remote: Total 54 (delta 22), reused 0 (delta 0), pack-reused 0
Unpacking objects: 100% (54/54), 71.74 KiB | 282.00 KiB/s, done.
Updating files: 100% (5/5), done.
Filtering content: 100% (2/2), 7.14 GiB | 14.32 MiB/s, done.

>dir
stable-diffusion-v-1-4-original のディレクトリ

2022/09/04  22:31    <DIR>          .
2022/09/04  22:23    <DIR>          ..
2022/09/04  22:23             1,478 .gitattributes
2022/09/04  22:23            11,891 README.md
2022/09/04  22:32     7,703,807,346 sd-v1-4-full-ema.ckpt
2022/09/04  22:29     4,265,380,512 sd-v1-4.ckpt
2022/09/04  22:23            71,237 v1-variants-scores.jpg
               5 個のファイル      11,969,272,464 バイト
clone すると、ユーザ・パスワードを聞かれるので HuggingFace のユーザ名/パスワードを入力します。
clone結果としては上記のような形で、11GBほどファイルがありますね。。。
sd-v1-4.ckptをmodel.ckptにリネームしておきます。
Dockerでの環境構築
Dockerのベースイメージに関してはNVIDIA Cloudのものを利用すると良さそうと偉い人が言っているので素直に真似る
FROM nvcr.io/nvidia/cuda:11.7.1-cudnn8-runtime-ubuntu20.04

ARG DEBIAN_FRONTEND=noninteractive
ENV TZ=Asia/Tokyo

RUN apt-get update && apt-get install -y wget git git-lfs libglib2.0-0 libsm6 libxrender1 libxext-dev

RUN wget https://repo.anaconda.com/miniconda/Miniconda3-latest-Linux-x86_64.sh && \
    sh Miniconda3-latest-Linux-x86_64.sh -b -p /opt/miniconda3 && \
    rm -r Miniconda3-latest-Linux-x86_64.sh

ENV PATH /opt/miniconda3/bin:$PATH

RUN git clone https://github.com/CompVis/stable-diffusion && \
    cd stable-diffusion && \
    conda init bash && \
    conda env create -f environment.yaml && \
    echo "conda activate ldm" >> ~/.bashrc
さらに、DockerComposeを用意する
version: '3'
services:
  app:
    build: .
    working_dir: /stable-diffusion
    tty: true
    volumes:
      - ./stable-diffusion-v-1-4-original/:/stable-diffusion/models/ldm/stable-diffusion-v1/
      - ./outputs:/stable-diffusion/outputs
    deploy:
      resources:
        reservations:
          devices:
            - capabilities: [gpu]
    environment:
      - NVIDIA_VISIBLE_DEVICES=all
      - NVIDIA_DRIVER_CAPABILITIES=all
さて、動かすぞ
>docker-compose up --build
[+] Building 2.1s (8/8) FINISHED
 => [internal] load build definition from Dockerfile                                                               0.0s
 => => transferring dockerfile: 717B                                                                               0.0s
 => [internal] load .dockerignore                                                                                  0.0s
 => => transferring context: 2B                                                                                    0.0s
 => [internal] load metadata for nvcr.io/nvidia/cuda:11.7.1-cudnn8-runtime-ubuntu20.04                             2.0s
 => [1/4] FROM nvcr.io/nvidia/cuda:11.7.1-cudnn8-runtime-ubuntu20.04@sha256:4ee00dd83e88e75739870df5ac67ec38bea09  0.0s
 => CACHED [2/4] RUN apt-get update && apt-get install -y wget git git-lfs libglib2.0-0 libsm6 libxrender1 libxex  0.0s
 => CACHED [3/4] RUN wget https://repo.anaconda.com/miniconda/Miniconda3-latest-Linux-x86_64.sh &&     sh Minicon  0.0s
 => CACHED [4/4] RUN git clone https://github.com/CompVis/stable-diffusion &&     cd stable-diffusion &&     cond  0.0s
 => exporting to image                                                                                             0.0s
 => => exporting layers                                                                                            0.0s
 => => writing image sha256:5d2c7f98241a55c1f2b608d865bfb22e09b1f91dc425d86db7a55d8e2b4d7b07                       0.0s
 => => naming to docker.io/library/stablediffusion-app                                                             0.0s

Use 'docker scan' to run Snyk tests against images to find vulnerabilities and learn how to fix them
[+] Running 1/0
 - Container stablediffusion_app_1  Recreated                                                                      0.1s
Attaching to stablediffusion-app-1
シーン。。。。
ここから、うんともすんとも言わなくなってしまった。
せめてエラーでも出してくれればいいのだが、いくら待っても何度やり直しても結果が変わらないので、きっと何かが足りないのであろう。。。
げせぬ
というわけで、一旦Docker Composeは諦めて、DevContainerで試行錯誤してみることにした。
続きは明日。。
参考: Stable DiffusionをDockerで動かすhttps://zenn.dev/choshicure/scraps/14bca2492bf49f